Home made Dry Mint Powder

Home made Dry Mint Powder

I had always seen Home made Dry Mint Powder in my mom’s spice collection in the kitchen. My mother used to prepare this powder from freshly plucked mint leaves from our kitchen garden. We used to grow mint leaves in a big area that provided us with many leaves enabling us to prepare home made dry mint powder for the whole year.

Mint is a wonderful aromatic herb and is not at all difficult to grow in your kitchen garden or pots. We can use fresh mint leaves to prepare dry mint powder. Dry mint powder adds excellent flavor to summer drinks like Kachhi keiri ka pana/panna (raw mango beverage), lemon juice, butter milk, water melon juice etc. It can be added in plain curd or any raita.

While drying fresh mint leaves for powder, never dry them directly under the Sun’s heat. Heat kills the aroma of the leaves – so always dry them in a shadowed place. In case of rain, we can dry them in microwave or oven too.

Ingredients :

Fresh mint leaves

Process :

Pluck out fresh leaves of mint from the stems and wash them with running water.

Let them stay in the sieve till the water dries out completely.

Later, spread these leaves on a newspaper or dry cloth to dry out.

Don’t keep these leaves under the direct heat of Sun as that will diminish the flavor of mint. You can keep them under the fan. In the heat of summer, leaves will dry out inside the house too. Leaves will shrink in a day or two, their colour will change and they will look like this…

Now keep them in a broad bowl and let them dry till they become crispy dry.

Home made Dry Mint Powder

Rub dry mint leaves with your palms or grind them in a mixer.

Home made Dry Mint Powder is ready to use!!

Home made Dry Mint Powder

As no moisture is left in the leaves, these can be easily stored in an air tight container.

Home made Dry Mint Powder

 
lahsun ki chutney (garlic chutney)

Lahsun (garlic) ki chutney

lahsun (garlic) ki chutney add zing in your food. It is part of traditional Rajasthani cuisine. I have always been blessed with a good neighbourhood. After my marriage, I moved to Chennai and stayed there for 9 months. Later we moved to Jamaica before settling in Bangalore after three years. At all these places I was surrounded by wonderful people in my neighbourhood.

In Jamaica when suddenly my daughter became sick, along with our Indian friends, my Jamaican neighbours were extremely helpful. On the occasion of Apoorva’s 1st birthday celebration, my Jamaican neighbours loved Indian food a lot and they requested to pack some for the next day.

In Jaipur, my parents’ house is blessed with kind and friendly neighbours and food is shared between us frequently. We developed a taste for authentic Rajasthani cuisine because Rajasthani neighbours used to bring food to our house or we were the frequent visitors in their house on several occasions.

So this year, during summer vacation when I visited my parents’ house, all childhood memories were revived. And I was very lucky when we got an invitation from the same neighbours for dinner. We relished all authentic delicacies but I still felt that something was missing from the menu. Then my sister pointed out that garlic chutney is not there. I asked them about the missing dish and got the assurance that before I go back to Bangalore I will surely get “Lahsun ki chutney”.

After coming back to Bangalore I was tempted to prepare this chutney. This chutney is cooked with lots of oil, so we can keep it in an airtight container in the fridge and it will last for at least 2 weeks. We can also use it as a part of gravy for vegetables and tadka for lentils.

In Rajasthan, if you have seen this chutney, you will find that oil will be floating in the container and the chutney is red in colour as lots of dry red chilies are used here. I didn’t want so much oil, so reduced the quantity of oil and instead of dry red chilies, I have used raw red chilies as they were available in my kitchen.

You can check a few more posts in the blog for other chutney recipes also…Imli ki meethi chutney,Tamatar ki chutney,Coriander Chutney (dhaniye ki chutney)

Ingredients :

Peeled garlic cloves 100 gm
Red chili 🌶 50 gm
Oil 1/4 cup
Cumin seeds 1/4 tsp
Salt as per your taste
Asafoetida 1/8 tsp
One small onion and a small tomato 🍅

Process:

Keep peeled garlic cloves, red chilies, tomato and onion together.

IMG_20190627_094408651

Chop onion and tomato and grind everything together in a smooth paste.

grinded paste of lahsun ki chutney

In a small wok, heat oil, crackle cumin seeds and asafoetida and add garlic paste. Cook it on sim heat for 15 minutes. Let it cool down completely and use it as any part of your meal.

lahsun ki chutney (garlic chutney)


Moong ki daal ke cheele

Mostly people associate chilka moong daal with khichdi vaali daal. My mother used to prepare this lentil with spinach on sim heat of “mitti ka chulha” during winter. Later she used to add dhaba style desi ghee ka tadka.  No matter how much I try, but I can never get that heavenly taste in my pressure cooker cooked daal.

During winter sometimes my mother used to prepare “cheele” (Indian style pancake with green lentils) with moong daal for dinner along with any green chutney or pickle. Moong daal cheela is a very popular snack during North Indian marriage feast. There they also add grated paneer to make it look like a part of marriage celebration feast. You can witness a long queue of people inside the shamiyana (place where marriage ceremony happens) to have hot moong ki daal ke cheele.

IMG_20181215_153816446_BURST000_COVER_TOP.jpg

These cheele could be a part of any meal of the day – but generally they are prepared for breakfast. As lentils are very good for our health, this breakfast will be a good option for all age group members of the family.

IMG_20181215_153737274.jpg

Ingredients

Green split moong daal 2 cups
Water 4 cups
Salt, red chilli powder, asafoetida (hing), chopped green chillies and ginger.

Ingredients :

Wash and soak moong daal overnight or for three hours in the morning. It will puff up nicely after soaking.

IMG_20181215_134403258.jpg

Don’t throw away water and grind daal along with fresh ginger, green chillies, Asafoetida, red chilli powder and salt. Use very little quantity of the saved water while grinding. Grated daal should have dropping consistency, neither too thin nor too thick .

IMG_20181215_144739455.jpg

Heat tava, grease it with little quantity of oil.

IMG_20181215_144619782.jpg

Spread two small size spoons of batter on it.

IMG_20181215_145612049.jpg

Reduce the heat to medium. When it starts looking dry from the top, spread some oil around the edges of cheela. With the help of flat spatula, start scrubbing from the sides and turn it to the other side.

IMG_20181215_151033803.jpg

Apply oil on the roasted side of cheela and follow the same process for the other side too.

IMG_20181215_145819148.jpg

When cheela is properly roasted on both the sides, serve it hot with any chutney, pickle or sauce.

IMG_20181215_154505307.jpg


Tomato Soup

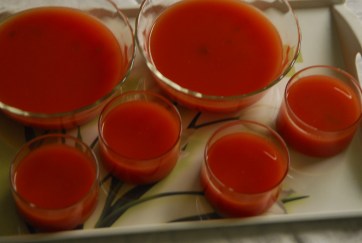
Tomato is a great versatile fruit or vegetable. They are kept in fruit category, but I always find it odd to call it fruit. Just like all other vegetables we add tomatoes in salads, they enhance the flavor of vegetables and they can be cooked separate in the form of chutney,  dips, stuffed , roasted and of course as soup. I guess tomato soup is one of the easiest soup to be prepared by anyone. Just boil, sieve, cook and add your choice of flavours. My favorite flavor with tomato is mint, but  basil also works very well. When I was young, during winter my father used to give us 4-5 fresh basil leaves to eat everyday as a protection cover from cold. So now, in my tomato soup I add home grown dry and fresh basil leaves. It gives beautiful warm flavor to soup!

_JRK0019

Adding flavors in a soup is completely an individual choice, so you can try basil, mint, ginger, cinnamon, garlic or any other ingredient of your choice.

Ingredients :

5               Big size tomatoes

1 cup         Water (for boiling)

1 +1/2 tsp          Salt

1 tsp          black pepper powder

1/2 tsp       dry basil powder

8-10            fresh basil leaves

Water        1 +1/2  cup

Process :

Wash and cut big pieces of tomatoes and boil them in one cup of water.

IMG_20181206_092246616.jpg

After boiling let them cool down in a bowl, later grind them in a mixer and sieve the pulp.

IMG_20181206_114840439.jpg

IMG_20181206_115738818.jpg

Add 1+1/2 cups of water and salt and boil this pulp on sim heat for 15 minutes.

IMG_20181206_120147957.jpg

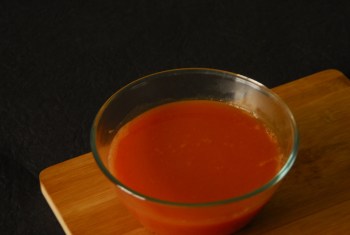
After 15 minutes switch off gas, add black pepper powder and dry basil powder. While serving add fresh basil leaves.

_JRK0015


_JRK0019


Carrot tomato soup

Hot soups and winter go together!! We don’t need any occasion for soup, though if you are suffering with bad cold, drink any hot soup and take a long afternoon nap – you will feel much better.

_JRK0025.JPG

During winter season when kids are back from school you can serve them hot soup accompanied by any bread, toast or sandwich. Apoorva loves to have her favorite cheese sandwich with soup and now as bright red sweet carrots are available in Bangalore, I decided to prepare carrot tomato soup flavoured with dry and fresh mint leaves!

_JRK0026.JPG

Ingredients :

200 gm carrots
300 gm tomatoes
1 cup water for boiling
1/2 tsp black pepper powder
Salt 1+1/4tsp
Dry mint powder
Fresh mint leaves
2 cups water

Process :

Chop carrots and tomatoes and boil them with 1 cup of water till carrots become soft.

IMG_20181202_121937643.jpg

After boiling, let them cool down and later grind in mixer.

IMG_20181202_130213260.jpg

Sieve the pulp in a strainer, add 2 cups of water and boil this for 10-15 minutes on sim heat. Add salt.

IMG_20181202_132134425.jpg

IMG_20181202_133229664.jpg

Once soup is done, transfer it in a serving bowl and add dry mint powder and black pepper powder.

_JRK0023


0312-2018-1110046184808535594450.jpeg

The  color of soup will slightly change by adding black pepper and dry mint powder. While serving in soup bowls you can add some more dry mint powder and cream.

0312-2018-1147639185125331622205.jpeg


_JRK0032


Suji ke cheele

Rava, samolina or suji is a very versatile ingredient. With rava we can cook savoury breakfast, fry snacks, prepare sweets, add it with other flours to give crunch, and can even can bake bread too!

In North India we prepare different types of “cheela” for breakfast. Cheela is very similar to South Indian dosa, but the biggest difference is that cheela batter is not fermented. Cheela can be prepared with your choice of daal (lentils), gram flour and rava. Moong daal cheela with paneer is a very popular snack stall during marriages.

During winter season at my parents’ house my mother used to prepare rava cheela by adding grated vegetables in it for dinner with coriander and tomato chutney. Sitting, chatting and having dinner with all family members in the kitchen used to be very cosy and warm.

Initially we used to prepare cheela on iron tava but then non stick tava was introduced and my mother also bought one. But right from the beginning I never liked non-stick tava. One has to be very careful while using them and while cleaning you can’t scrub them completely to clean the oil. Call me old fashioned, but my preference always remained solid iron tava. Slowly, I became so good in preparing thinnest dosa or cheela that you give me any thin or thick iron tava – I can give you the best cheela or dosa from it. Not boasting, but practice makes you perfect!!

Don’t you agree….

Ingredients :

Rava, salt, red chilli powder, a small pinch of asafoetida powder and turmeric powder, onion, carrot, coriander leaves, cabbage, ginger, and oil.

Process:

In a bowl take rava and add water in that to soak it for half an hour. In the meantime grate carrots, ginger and finely chop onions, cabbage and coriander leaves. After half an hour add all chopped and grated vegetables in soaked rava.

IMG_20180909_090102293.jpg

Mix everything well. If batter is thick cheela will be thick and crisp, if it is thin, cheela would be thin and soft. If you are a beginner, better start with thick batter.

IMG_20180909_090414654.jpg

Heat thick bottomed or non-stick tava and slightly grease it with oil. Once tava is hot, reduce the heat  to sim and with the help of the ladle take batter and place it on tava.

IMG_20180909_091124578.jpg

Slowly spread it with ladle evenly and increase the heat to medium to high.

IMG_20180909_092140572.jpgSlowly cheela would start looking dry – spread very little oil all around it on tava and reduce heat to sim. With the help of flat ladle slowly start with the edges and without breaking turn it to the other side.

IMG_20180909_091812368.jpg

IMG_20180909_093300503.jpg

Apply oil all over it and again turn it on to the other side and apply oil.

IMG_20180909_092823141.jpg

Slightly press with the laddle on both sides while it is getting cooked until completely done.

IMG_20180909_093724370.jpg

Serve hot with chutney or sauce.

IMG_20180909_094244263-01.jpeg


IMG_20180909_094325743-01.jpeg